Create a DEM with ArcGIS Pro - Tutorial
In a previous tutorial we covered how to create a digital elevation model (DEM) using open source solutions. In this tutorial we will use ArcGIS Pro to create a DEM to help highlight the costs and benefits of using this professional grade software.
What is ArcGIS Pro?
ArcGIS Pro is the flagship software that is developed by ESRI. ESRI is a leader in GIS software solutions and is the provider of choice when it comes to most large GIS infrastructures. In the last few years ESRI has invested heavily in making ArcGIS Pro the best GIS desktop software available on the market. Both ArcGIS Pro and QGIS have embedded features and tools that make them quite comparable.
Why use ArcGIS Pro?
You might ask, “Why not just use QGIS for free?”. There are some key factors that are involved in choosing a software that are explored in more detail in this article. When specifically considering the utilization of LiDAR in a GIS, you have to take into consideration how often you will be performing the tasks and possibly how big the datasets are. I have worked on some fairly big projects that have large coverages of LiDAR and due to licensing and budget restrictions I was forced to find an open source solution. It was definitely possible to achieve the desired results with open source but when I later tested the process using ArcGIS the processing efficiency and hardware demand was significantly lower.
The Sample Data.
This tutorial uses the same data as used in the DEM from LiDAR Using Open Source Software - Tutorial and the data can be found here in Google Drive. By using an identical LiDAR coverage we will be able to compare how quick the processing times are, how stable the software is and how demanding it is on computer hardware.
Step 1. ArcGIS Pro Project Setup
Open ArcGIS Pro and start a new project (***Note*** You will require the 3D Analyst Extension or the Spatial Analyst Extension in order to carry out most of the steps in this tutorial).
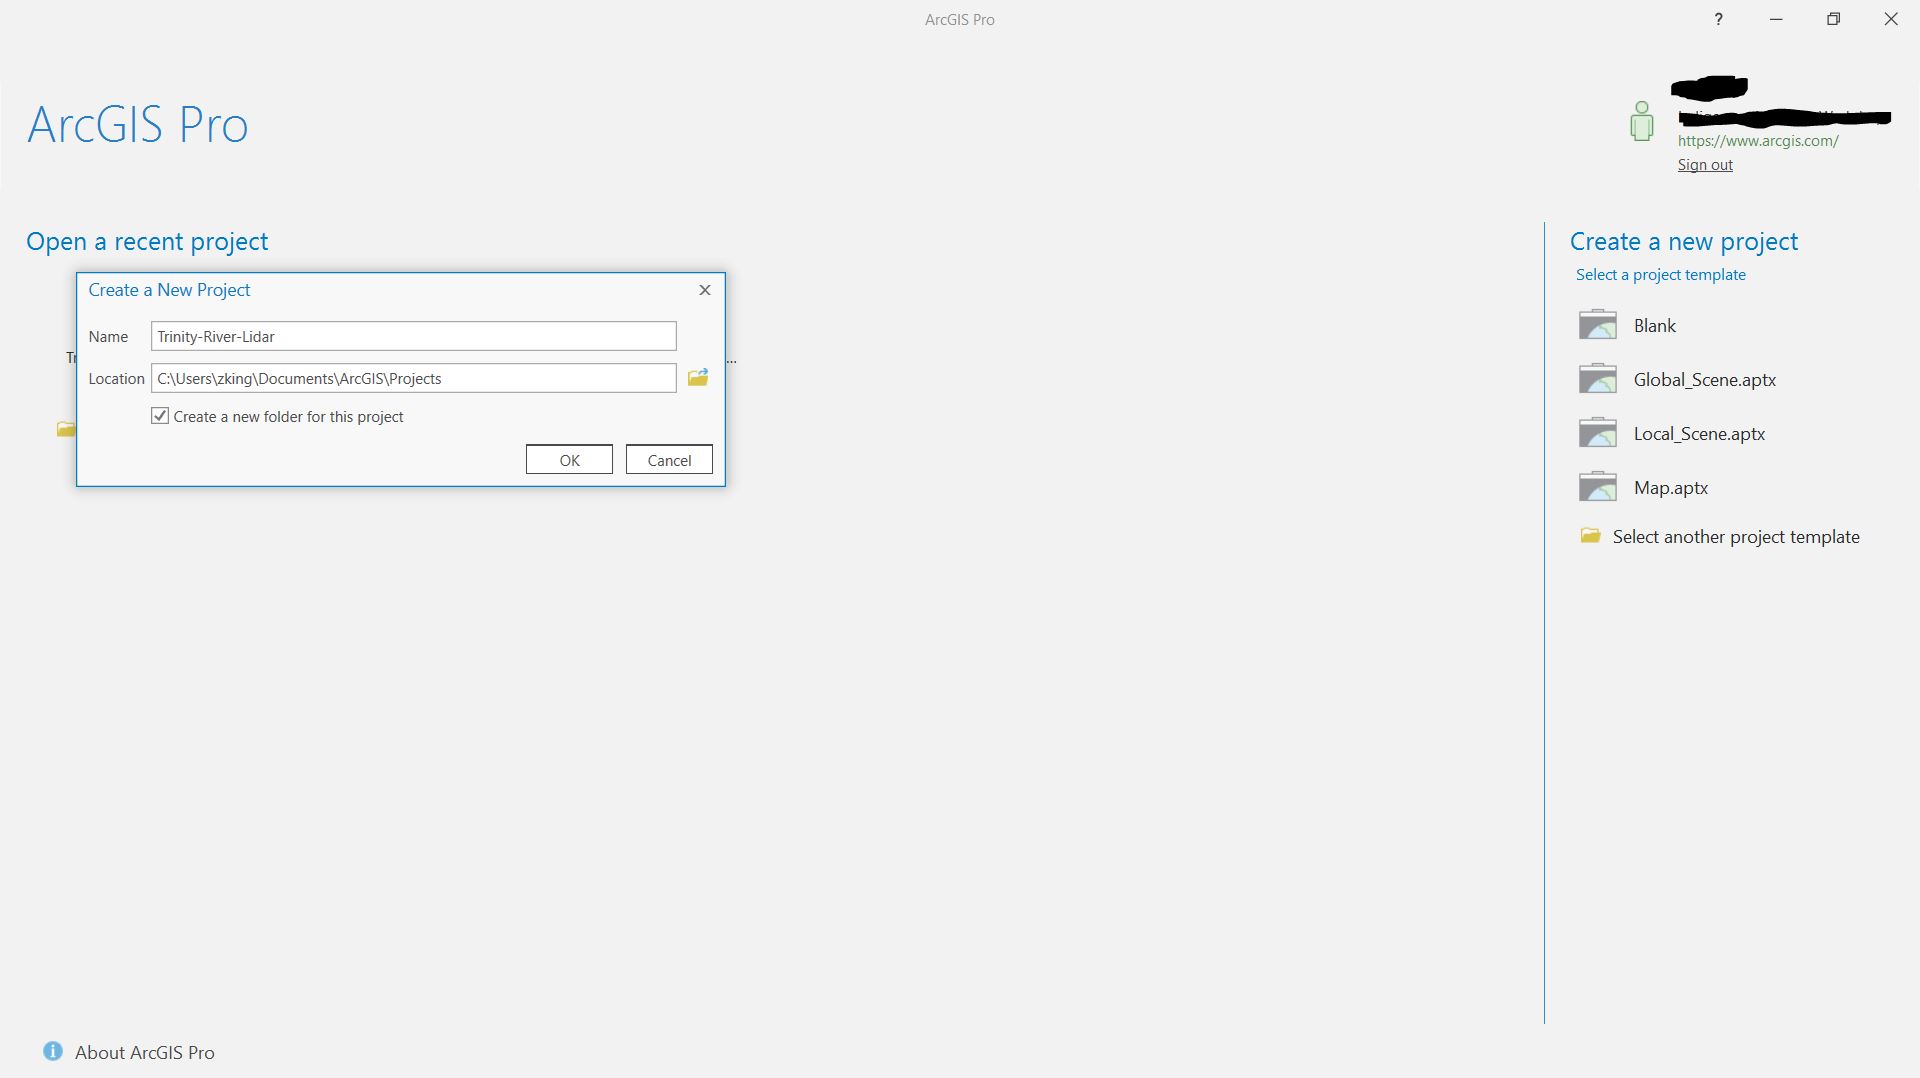
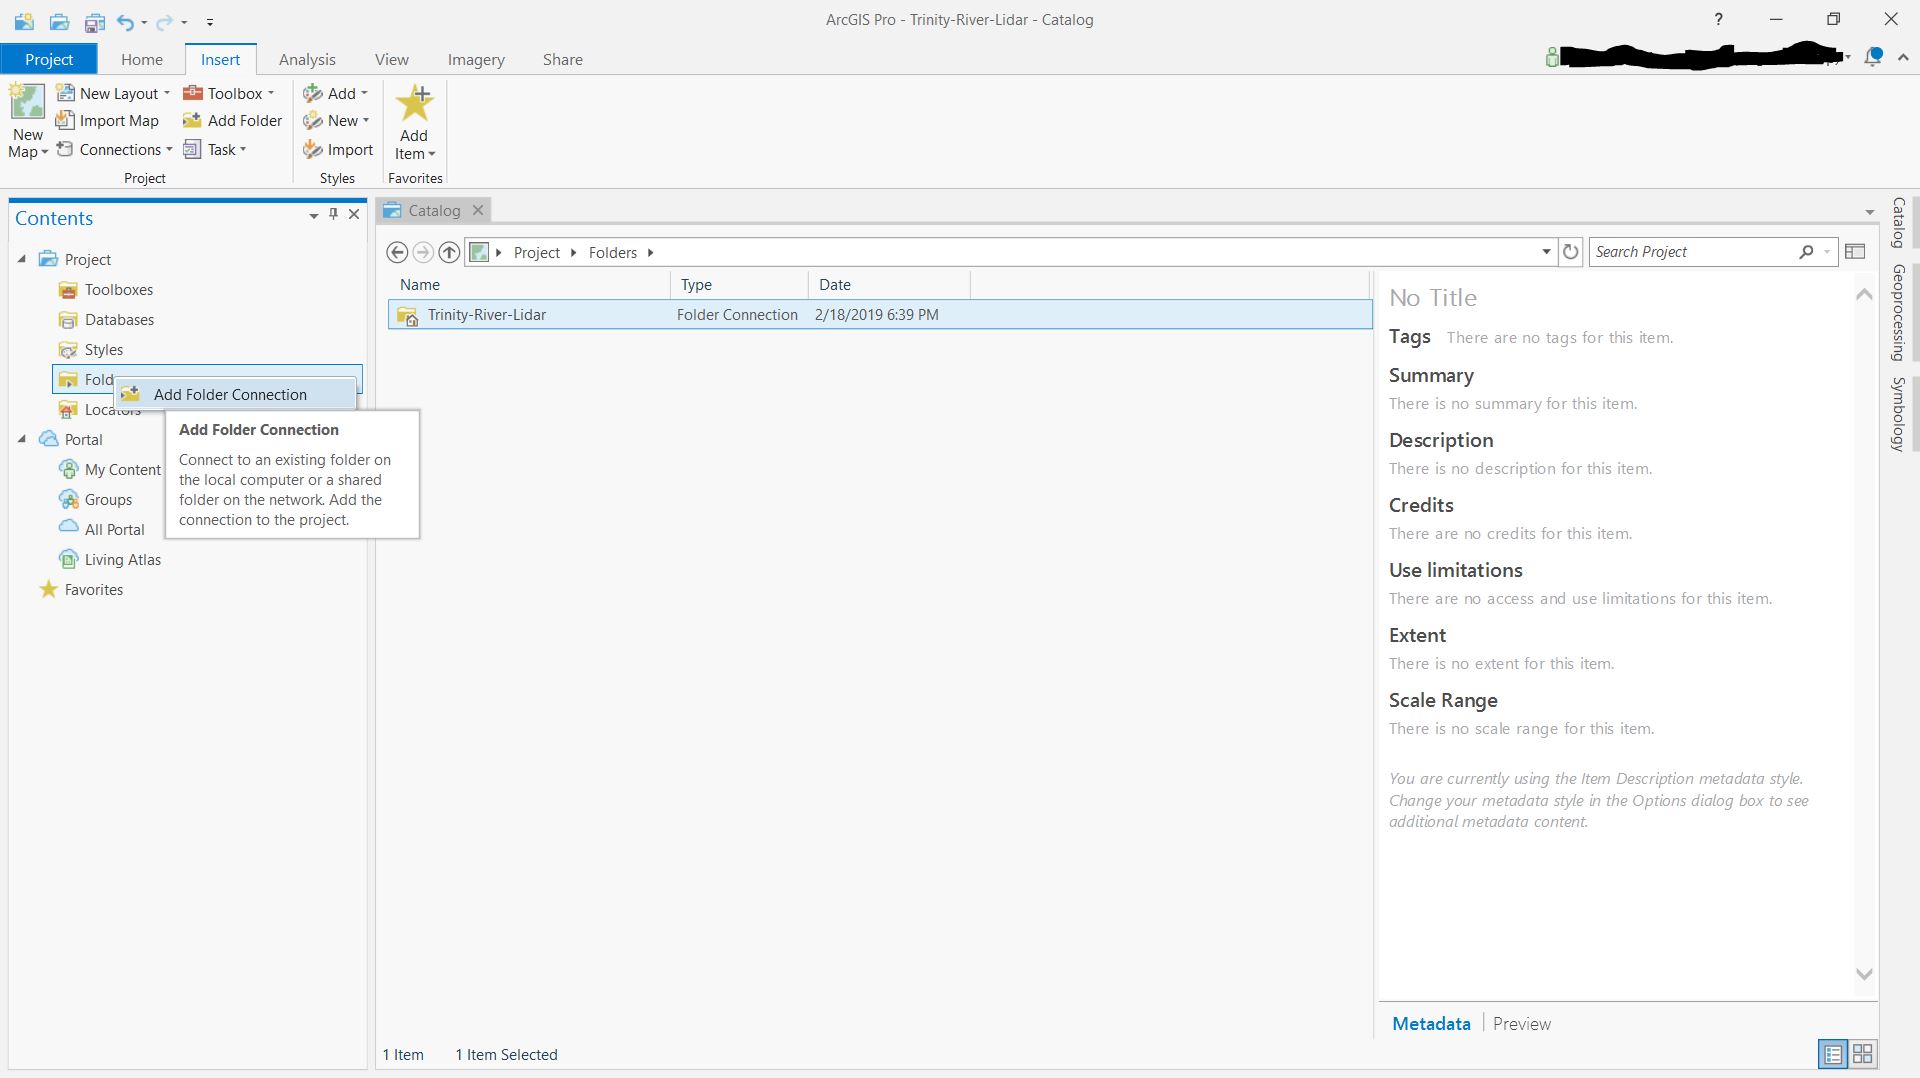
When I start a new ArcGIS Pro project I like to create a new connection to the directory/folder where the LiDAR or other data is stored to speed up the access to the data and reduce the number of files I have to browse through.
Step 2. Create New Map
Before we start creating data layers, we will create a new “Map” in ArcGIS Pro to hold and view the data layers. To do this click on the Insert tab and click on the New Map icon. With a new map open in the project, all of the data we generate in our analysis will automatically be visible.
Step 3. LAS Metadata
Before LiDAR point clouds are imported into a GIS it is important to know the spatial reference system/coordinate system of the data (both horizontal and vertical). This is imperative as often the information is not embedded in the LAS file and will significantly impact the accuracy of the processing results. Usually the LiDAR data provider will include a metadata document that describes the dataset. This should include file names, spatial reference system information, extent of the data and collection accuracy. Below is the metadata provided by OpenTopography. The key information needed for the next step is that the horizontal spatial reference system is
UTM Zone 15N NAD83 (2011) [EPSG: 26915] and vertical spatial reference system NAVD88 (GEOID 12a) [EPSG: 5703]
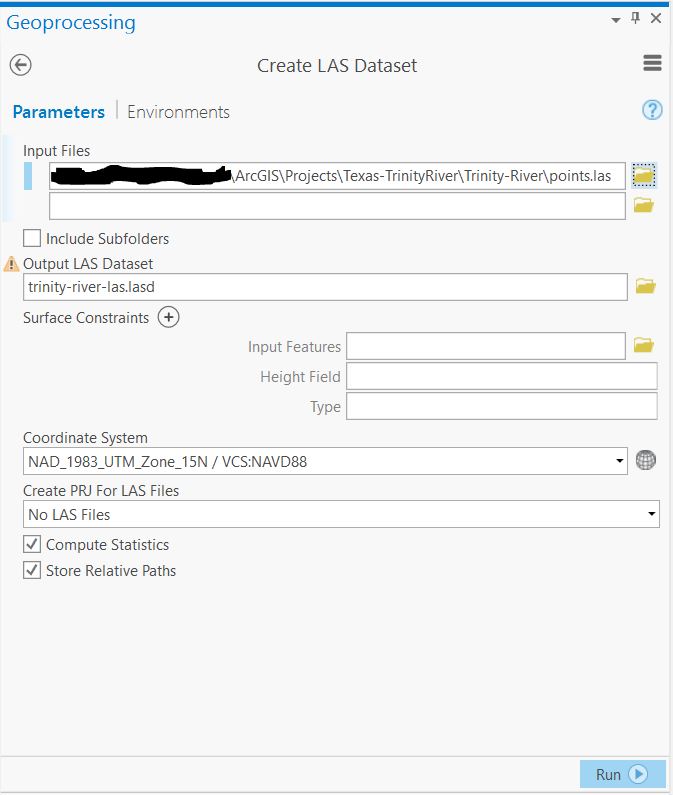
Step 4. Create LAS Dataset
An LAS Dataset is how ArcGIS Pro stores directions to the LiDAR file or files and also allows for specific parameters to be set on those files. This is a convenient way to access the point cloud data as the source data does not have to be modified for ArcGIS Pro to work with the information and parameters can be set to limit the incoming data to only contain the information the user needs to see, such as only ground points or first returns. Also, many LiDAR files can be added to the LAS Dataset so larger areas can be brought into the analyst without having to merge .las files.
To create the LAS Dataset click on the Analysis tab at the top of the window and click on the Tools icon. A panel with processing tools will open on the right hand side of the screen. You can either search by entering “Create LAS Dataset” into the Find Tools box or browse to the tool by clicking on Toolboxes, opening Data Management Tools -> LAS Dataset -> Create LAS Dataset
Open the tool and under Input Files click on the little folder icon on the right hand side of the text box and browse to your .las LiDAR file. The program will auto generate a name for the LAS Dataset but I would recommend changing the name to something more logical. Leave the rest of the parameters as default and click on run.
Step 5. LAS Dataset Properties - Ground Points Only
Once the LAS Dataset is created it will appear as a new layer in the active map. We now have to go into the layer settings to adjust the parameters to filter out any points that are not classified as ground returns.
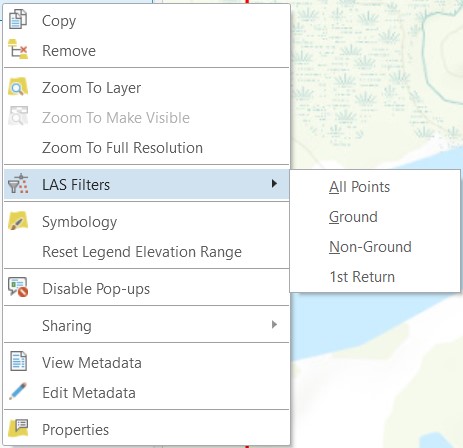
Option 1.
Right click on the LAS Dataset layer (i.e. trinity-river-las.lasd). Mousedown and hover over LAS Filters. A panel will open to the side with a list of options. Select Ground.
Option 2.
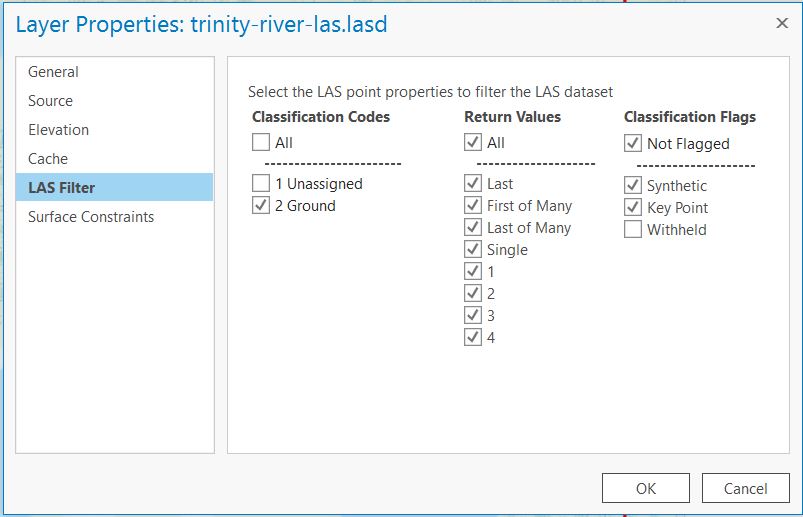
Right click on the LAS Dataset layer (i.e. trinity-river-las.lasd) and go to Properties. A window will open with the Layer Properties. On the left hand side of the window there is a list of layer information categories, click on the LAS Filter category. If you have properly classified LiDAR, under the “Classification Codes” options there will be at least 2 classifications as points: Ground and Unassigned or Ground and Non-Ground. To create a DEM from LiDAR only Ground should have a check mark beside it. The “Return Values” and “Classification Flags” can be left with the default settings. Click OK.
Step 6. Create DEM
The final process is to convert the LAS Dataset points to a raster using the Conversion Toolset (remember that the 3D Analyst or the Spatial Analyst license are required to use these tools). To make a DEM comparable to the one produced in the QGIS Tutorial we will use the binning method and Inverse Distance Weighting (IDW) to determine the raster cell values. This is a good way to create DEMs for terrain modeling especially when calculating watershed areas and predicting stream locations. This tool has the option to use Natural Neighbor interpolation to fill any DEM gaps where there are sparse LiDAR points leaving occasional bins or cells with no readings. The Natural Neighbor interpolation method will fill the void with an interpolated value.
To create the DEM raster click on the Analysis tab at the top of the window and click on the Tools icon. A panel with processing tools will open on the right hand side of the screen. You can either search by entering “LAS Dataset to Raster” into the Find Tools box or browse to the tool by clicking on Toolboxes, opening Conversion Tools -> To Raster -> LAS Dataset to Raster
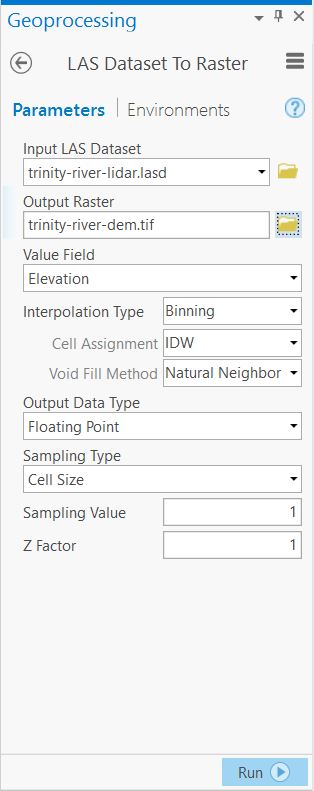
The key parameters for this tool are as follows:
Input LAS Dataset: Select LAS Dataset from Dropdown
Output Raster: //path/to/file/trinity-river-dem.tif
Interpolation Type: Binning
Cell Assignment: IDW
Void Fill Method: Natural Neighbour
Output Data Type: Floating Point
Sampling Type: Cell Size
Sampling Value: 1
Z Factor: 1
Step 7. Validate Results
The final step in the process is to validate the DEM. To do this we will generate a Hillshade raster from the DEM which will help to get a sense of the terrain, make any obvious errors evident, such as not selecting the proper return type (trees make the hillshade look very rough) and will verify there are no gaps in the data.
ArcGIS provides a couple of hillshade tools depending on what licensing you have, but the parameters will be the same. You can find the tools at the following toolbox paths:
Spatial Analyst License
Spatial Analyst Tools toolbox -> Surface -> Hillshade
3D Analyst License
3D Analyst Tools toolbox -> Raster Surface -> Hillshade
It is usually a good idea to make a few different hillshade rasters to see how the azimuth and altitude (i.e. light direction and angle). The look of the hillshade will vary depending on the terrain. For the purposes of this tutorial and to compare the results from QGIS the default parameters will be used on this dataset.
Conclusion
Through this tutorial you should now be able to create a DEM from LiDAR using ArcGIS Pro and validate the data by generating a hillshade raster. This DEM can be used as base data for a wide array of models and calculations such as viewsheds, watershed, slope, terrain ruggedness, least cost paths and much much more!
LiDAR is an extremely useful datasource for environmental and terrain modeling. ArcGIS Pro is efficient at working with large LiDAR datasets and as the software continues to improve so does its ability to visualize this information in 2D and 3D which is a huge step forward for ESRI’s desktop GIS software. The one caveat, however, is that depending on the type of analysis you wish to do, one or more software extension licences may be required which may not be cost effective if you do not utilize them on a regular basis. In that case check out our blog on LiDAR and QGIS!
If you have any questions or comments please feel free to create an account or safely and securely sign in with your Facebook, Twitter or GitHub account.
Results
Below is an interactive webmap showing the Hillshade raster that was produced from the DEM generated through this tutorial. Explore the map to see how detailed the terrain model is and turn the layer on and off to see how it compares to the imagery.
On Dec. 1, 2022, 7:15 a.m. craigbruce307 says:
The Logitech G502 HERO is a gaming mouse that’s sure to please. Built from the ground up with ergonomic comfort in mind, its right-handed design offers great support for long sessions of play. With low click latency and flexible CPI range, it also provides useful on-the-fly control options such as five programmable buttons plus a sniper button – perfect for precision aiming!