Introduction
A common operation in GIS is to add data to a master database. The workflow usually consists of receiving a shapefile and then adding that shapefile to a larger database of the same type of feature (i.e. project areas). It is advantageous to have one database with similar features that have a unique field value that a definition query can be applied to instead of having many layers or shapefiles that have to be managed.
This is a pretty common and simple workflow for most GIS software, however, I have found it to be more complicated and inconsistent with ArcGIS Pro than any other software. The following steps a the ones I use to have the most consistent results.
Caution must be used when doing this type of operation as you will likely be working with a large and valuable dataset that has had a lot of time invested into ensuring its quality and integrity. It is usually a good idea to create a backup of the master layer before performing this type of operation.
This example is also published as a YouTube video here.
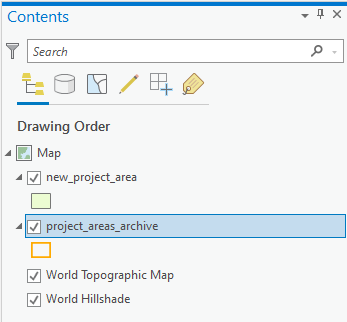
Step 1. Add the master layer to a map
Step 2. Backup target database/datastore
Step 3. Check validity and geometry type of source layer
Step 4. Make the source layer the only selectable layer
Step 5. Select source features with "Select" tool
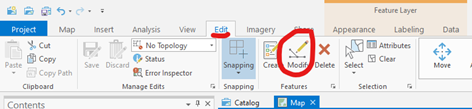
Step 6. Start a “Modify” editing session
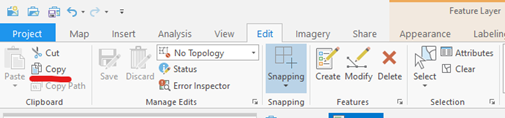
Step 7. Copy the source features
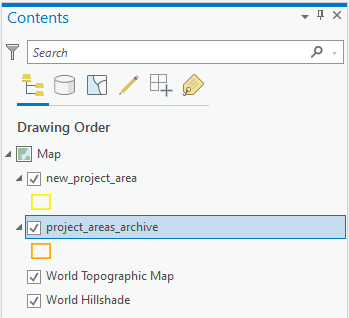
Step 8. Activate target layer
Step 9. Start a "Modify" session
Step 10. Expand the "Paste" tool
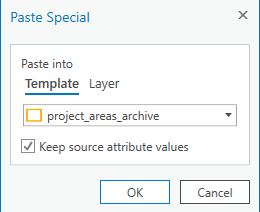
Step 11. Paste Features
Step 12. Save Edits
Step 1. Add the master layer to a map (or use an existing map)
In order to copy features from one layer/table/database to another in ArcGIS Pro, it is best practice to have both layers in the same map view. If there are many layers in the map, it might be worth creating a new map with only the target layers to simplify the process.
Step 2. Backup target database/datastore
Ensure a recent backup of the target layer has been made. If one has not been made recently, create a new backup. This is particularly important if you are copying a large number of features across or if several users perform the same operation.
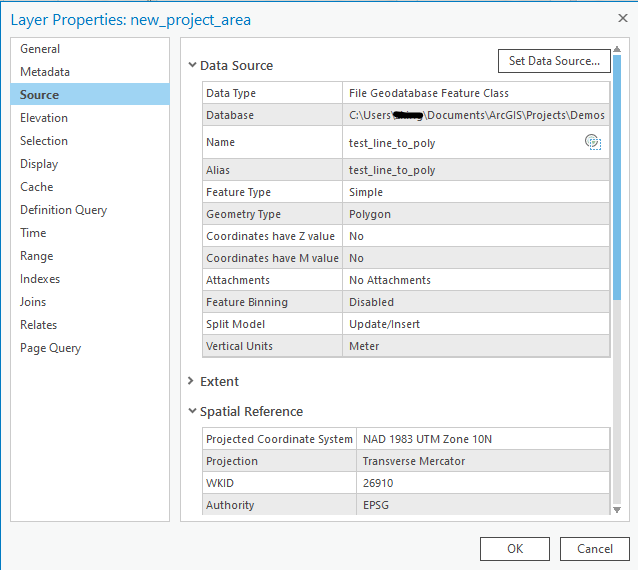
Step 3. Check validity and geometry type of source layer
When copying data between two feature classes/layers it is imperative that both feature classes have the same geometry type (i.e. point, line or polygon). It is also helpful if both feature classes are in the same coordinate system to ensure spatial accuracy before copying, but it is optional as ArcGIS Pro will reproject the data on-the-fly.
Also consider the table values before performing the copy and paste process. The only field data that will copy across are fields with identical names and data types. You may have to modify the source table before copying if the table data is integral.
Right click on the source layer and the target layer to explore the metadata to ensure the required properties (geometry type, spatial reference, data fields) are compatible.
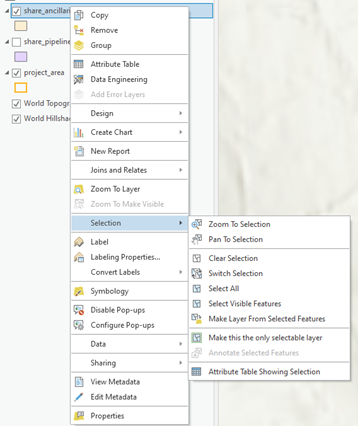
Step 4. Make the source layer the only selectable layer
It is a good idea to make the source feature class/layer the only selectable layer. Right click on the source layer in the Contents Pane, hover over the "Selection" option and select "Make this the only selectable layer" from the child dropdown menu.
Doing this will ensure that only the features you want to select will be selected. Otherwise you could run the risk of selecting features from other feature classes.
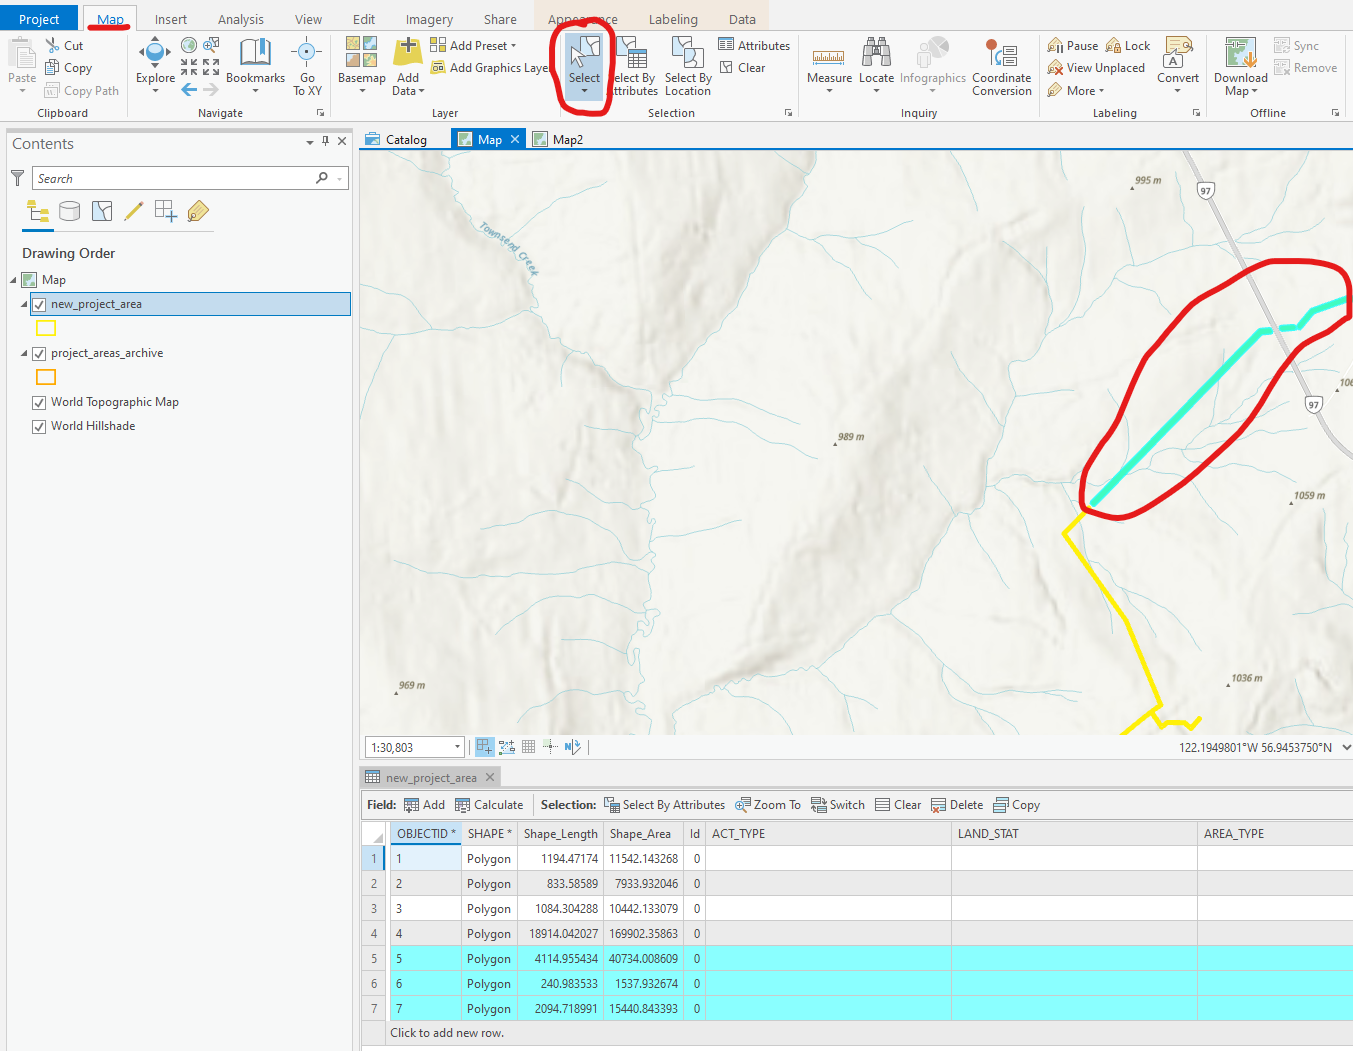
Step 5. Select source features with "Select" tool
Using the "Select" tool (found in the Map tab in the Ribbon) or the Attributes table, select the features you want to copy.
Step 6. Start a “Modify” editing session from the “Edit” tab in the Ribbon
To start an edit session, make sure that your source layer is highlighted in the Contents Pane. If you are not familiar with the ArcGIS Pro Ribbon, you will see that the content can be dynamic based on what else is selected in the software.
Step 7. Copy the source features
Copy the source features (only the selected features will be copied) by using the "Copy" button in the Ribbon under the Edit tab. This is a copy function that is specific to copying features, other copy functions can be found in ArcGIS Pro, but likely copy some other types of information, such as the actual layer.
Step 8. Activate target layer
Now that the source features are copied, we will activate the target layer in the Contents Pane where the features will be pasted by simply highlighting the layer.
Step 9. Start a "Modify" session on target layer
Similar to Step 6, start a modify session on the target layer. This may be redundant as a modify session may carry over from Step 6, but it is good practice to start another one as it can fail sometimes.
Step 10. Expand the "Paste" tool
Pasting the copied features into the target feature class/database, requires users to find the "Paste Special" tool which hides as a drop down option in the Ribbon under the Edit tab and is found by clicking on the arrow under the "Paste" button.

Step 11. Paste Features
When the "Paste Special" button has been clicked a popup window will appear where you can select the target feature class. Select the "Template" layer to paste to and then use the map view and attribute table to ensure the features copied properly.
Step 12. Save Edits
Now that we have confirmed that everything has copied over to the target layer correctly we can finalize the edits. To do this go to the Edit tab in the Ribbon and click on the "Save" button. Your edits have now been saved to the feature class/database!

Watch the full tutorial on the Points North GIS YouTube channel.
Don't forget to like and subscribe to support more of these free tutorials!
On Aug. 18, 2022, 8:53 a.m. pkeidel says:
I appreciate this posting, thank you!! Yes, copying and pasting between layers is a common practice, so having this somewhat Rube-Goldberg process clearly explained is a big help.